


The Halo Master Chief Helmet: An Icon for a Reason
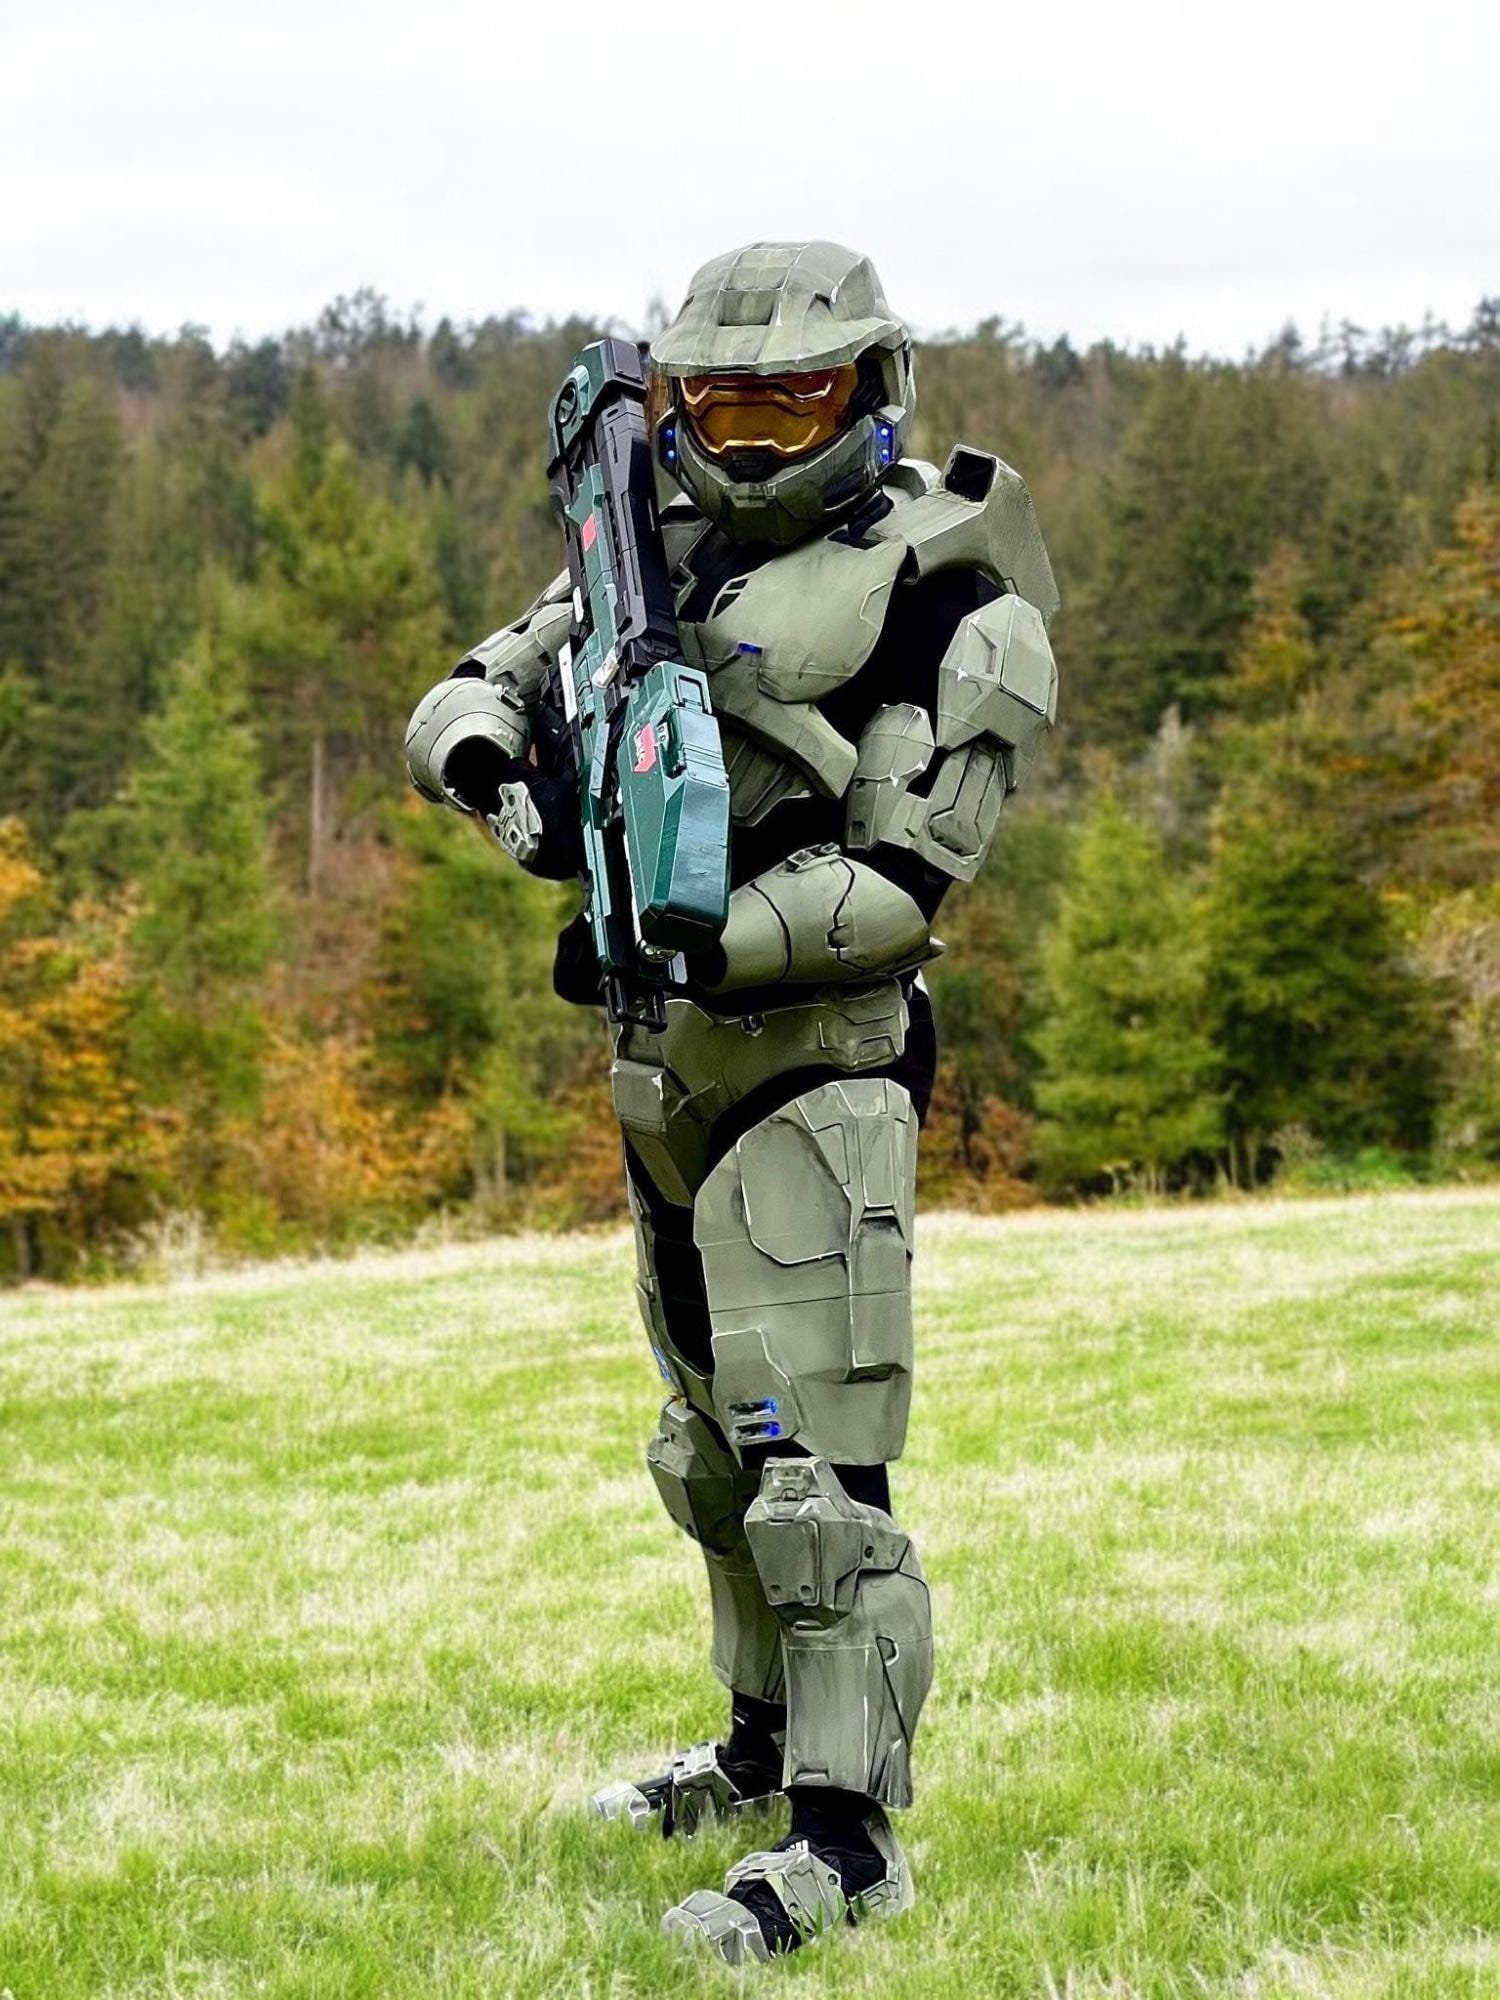
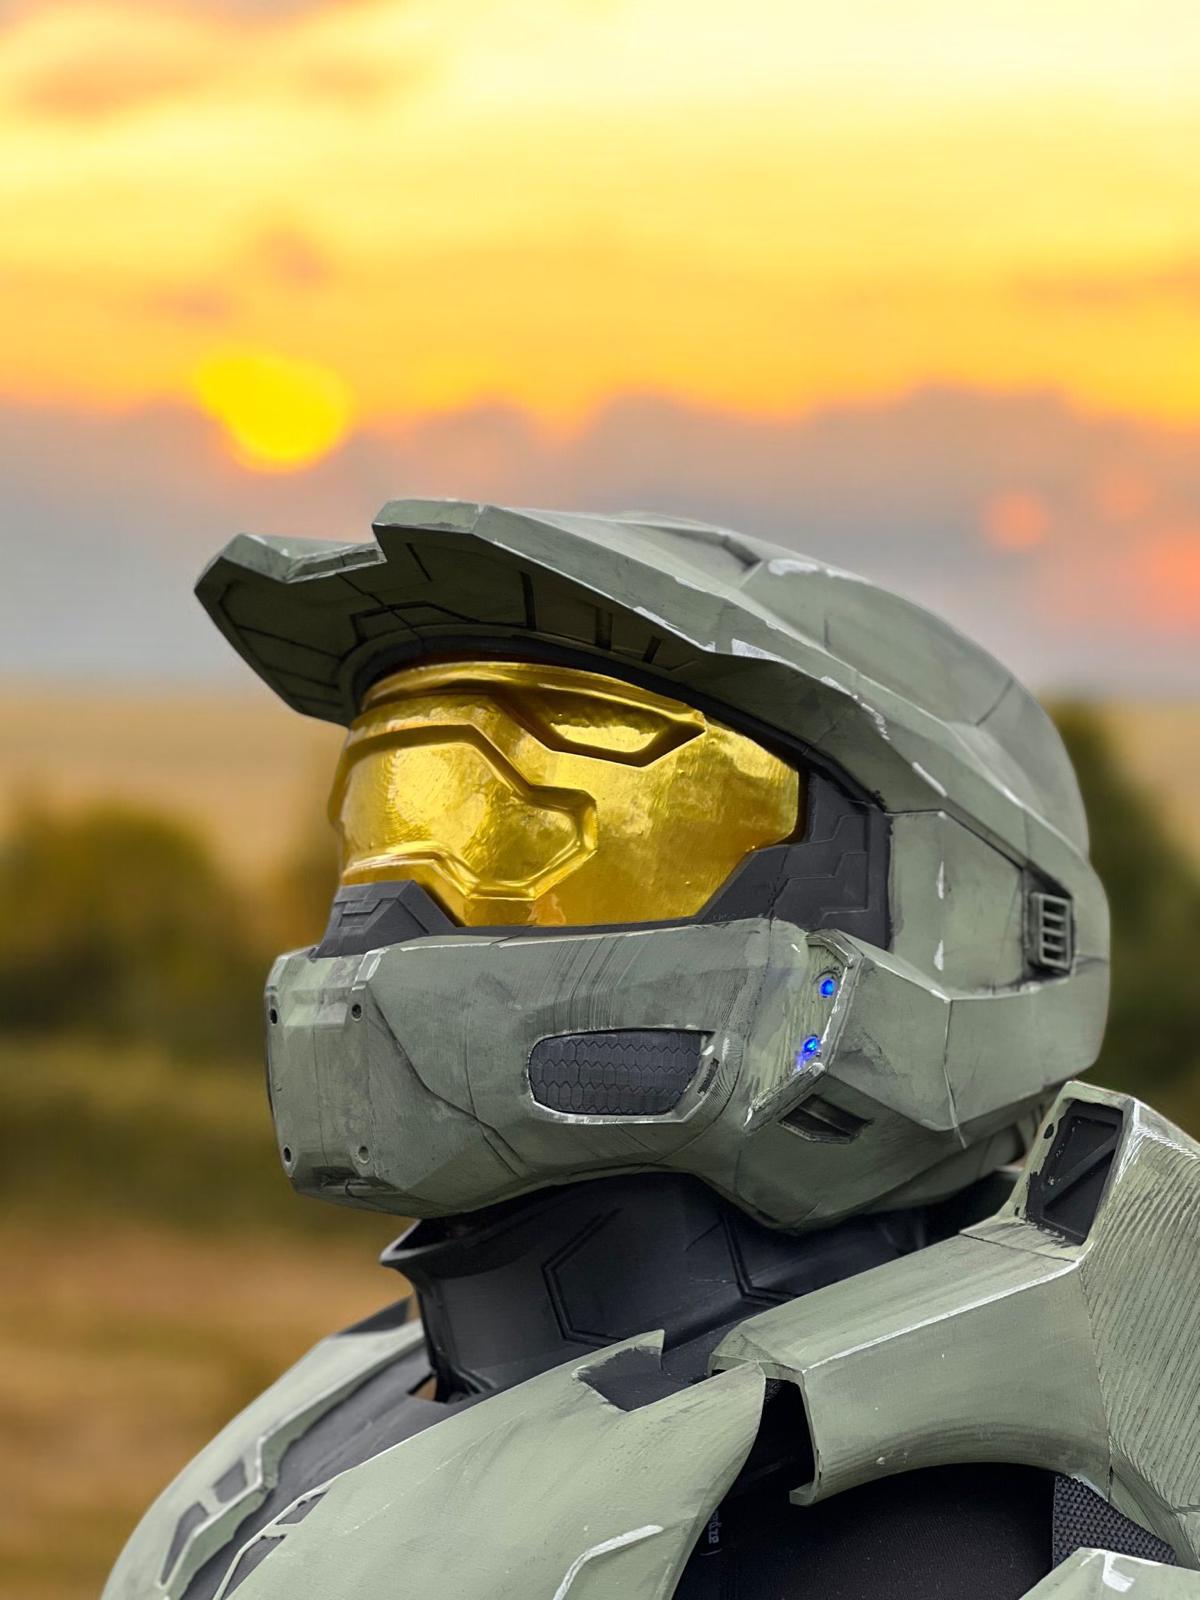
If there's one prop in gaming cosplay that's universally recognized — even by people who don't play games — it's the Master Chief helmet. The MJOLNIR Mark VI visor is as iconic to gaming as Darth Vader's helmet is to film. Building a great Master Chief helmet replica is both a dream project and a genuine challenge, because everyone knows what it's supposed to look like.
In this tutorial, we'll walk through the painting process for a Halo MJOLNIR helmet. This guide assumes you're starting with a primed, sanded prop — either one you've printed or one you've ordered from us unpainted.
Reference Materials First
Before you open a single can of paint, spend time studying reference images. For Master Chief, official Halo 3 and Halo Infinite art books are excellent sources. In-game screenshots with the camera close to the armor reveal surface textures, chip patterns, and the exact color of the visor. Save 10–15 reference images to your phone so you can reference them while painting.
Colors You'll Need
For the classic Halo 3 Master Chief color scheme:
- Base armor: Dark military green (Vallejo Model Color 70.894 or equivalent)
- Shadow tone: Dark olive/black mix for recessed areas
- Highlight tone: Lighter desaturated green for raised edges
- Visor: Chrome/gold metallic base under a tinted amber top coat
- Weathering: Dark brown wash + silver dry brush for battle damage
- Clear coat: Matte for the armor body, gloss for the visor
Step 1: Base Coat
Apply your dark military green as an even, opaque base coat across the entire helmet. Use an airbrush for best results — it gives you a smooth, spray-can-like finish without the texture of rattle cans. Two thin coats are better than one thick coat. Let each coat fully dry before the next.
If you're using rattle cans, apply light, sweeping passes from 8–10 inches away. Never hold the can still while spraying — it causes runs.
Step 2: Shadow Wash
Mix a dark brown-black wash (either a commercial wash like Army Painter Dark Tone, or a DIY mix of dark paint heavily thinned with water and a drop of dish soap). Brush this into all the panel lines, recesses, and joints of the helmet. The wash will flow into the recessed areas and dry darker than the surrounding surface, creating depth and definition.
Wipe away excess wash from flat surfaces before it dries using a lightly damp brush. Leave it heavier in deeper recesses.
Step 3: Highlight Edges
Dry brushing is your best friend here. Load a stiff-bristled brush with a small amount of a lighter green (mix white into your base color, or use a dedicated highlight color), then wipe most of the paint off on a paper towel until barely any is left. Now lightly drag the brush across all raised edges, corners, and surface details. The trace of paint that transfers will catch on the raised geometry and create a soft highlight effect.
Step 4: Visor Painting
The Master Chief visor is the most distinctive element. Start with a chrome or bright silver base — Alclad Chrome is a fan favorite for its mirror finish. Once the silver is dry, apply a tinted amber/gold clear coat (Tamiya's Clear Orange over Clear Yellow works beautifully). This creates the golden reflective visor effect seen in the games.
Seal the visor with a gloss clear coat, not matte — the reflective shine is part of the effect.
Step 5: Battle Damage and Weathering
Master Chief's armor always shows wear. Add chips using a silver paint pen or fine brush — concentrate them on corners and high-contact areas like the brow ridge, chin, and ear sections. Use a sponge dipped in dark brown to stipple shadow areas where grime would collect.
Step 6: Final Clear Coat
Seal everything with a matte clear coat to protect your work and knock down any shininess on the armor body (keeping the visor gloss). Two light coats are better than one heavy coat to avoid clouding.